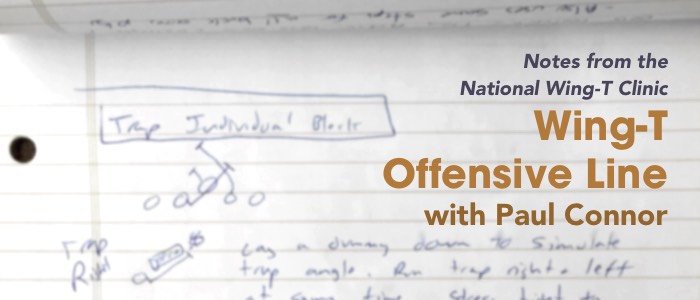
Wing-T Offensive Line with Paul Connor
I attended three hours of Paul Connor’s sessions on teaching the Wing-T offensive line. His approach is very similar to what I’ve been using for installation for the last few years. Paul brought an incredible amount of intensity and energy to his talk.
The Basics
- Paul uses shoulder technique, but he really considers it upper pectoral. Players should make a big surface, use chicken wing on shoulder side where he will be blocking.
- Why use shoulder and not just hands? Angle blocking, focus on lateral movement of defender
- Pinch defender between earhole and arm, keeping arm parallel to ground
- Fist to form chicken wing goes right on blockers pectoral
First drill: Fit and Strike a Blow
- Face a solid blocking dummy. The setup should allow coach to see everything, and if you have more than 8 players or so, put coach in the middle of two sets of three dummies with players moving away from the coach.
- Wind up with surface arm using a back-swing, wind-up, and strike the bag with face up
- Keep hips between feet and shoulders
- Aiming point is the belt buckle / waistline
- His teaching point is to focus on running out, sprinting through the block. He does not use “wide base” as a teaching point, instead saying “spring the knees”. He thinks aggressive, violent knee driving is more important than wide base.
- The first progression is a fit drill, with player on all sixes (hands, knees, toes) facing the bag (close enough to smell it). Body parallel to ground, “privates almost touching the ground.”
- The player then fits to the bag and holds for coach inspection.
- The second progression is execute the strike with a strong blow and layout from the same starting position.
- The third progression is “3 quick”, which is 3 strikes with quick rest between, check fit each time
- The fourth progression is “2 step”, with a short step and backswing, striking surface on the second step. Start with bird dog, then moving bag. They don’t do this from a full stance, just a football breakdown position.
- The fifth progression is “Fit and Finish” and is player on player with the defender helping get a good fit. It is a bird dog start for two steps followed by “go” or “sprint knees” to drive the player with off hand on the rib cage. Then reverse it back with the other player.
- The final progression is “One on one” and is from a three point stance. The defender should use a shield: Paul claims that if you are striking properly then doing reps without shields will actually start to bruise / injure the defender.
Stance
- Paul is OK with a slightly staggered stance. With the right hand down, the right foot can be back a bit (toe to ball of other foot).
- Fingertips on the ground, not knuckles, right in front of face
- Keep a flat back
- Butt and thighs are controlling balance - squeeze
- Grab grass with toes, causing heels to come up a small bit - just the slightest amount of air under the heel
- Feet shoulder width apart, maybe a tad wider
- “Survey the defense” and scan both ways. Don’t stare at the man you will likely block
Offensive Line Alignment
- Maintain 2 feet splits, consider TE at 3 feet
- Don’t mess with the above… it won’t help!
- The wingback if present should pay attention to how the TE is split and may need to adjust accordingly.
- Vertical alignment is just as I’ve been teaching for years: as deep as you can get but still be legal. The reason is that it gives time and space for gap block, pulling, running through.
- This starts with the Center who should have his arm outstretched and be as far off the ball as possible.
- The talking point for the guards is to put right hand on heel of the center
- Coaches should always be checking this. If you are doing this by yourself, start behind the players to check horizontal splits, then sprint to the side to see alignment off the center. Coach on the run and have a sense of urgency; no walking around!
Practice drill sequence
Bird Dogs
Paul likes to start practice off before warmups with everyone doing bird dogs (offensive line, QBs, etc.). QBs would be doing midline bird dogs, offensive line doing blocking step bird dogs. Might emphasize different blocks each day.
Put offensive line in a grid, e.g. 4x3 grid on 5, 10, and 15 yard line facing coaching standing on goal line. Players about 3–4 yards apart horizontally. Bird dog calls would be “Gap Right Block on Sound… Set!”
Individual Blocks
Gap and Down Block
Focus on individual blocks vs. bags in this portion, and Paul likes to start with the gap block (vs. down block because he thinks gap comes into play more often). One key point that I haven’t always followed: keep the bag off the player as far as a defensive lineman would be, likely 1 to 1.5 yards. This is to mimic the actual effective neutral zone based on where players will align. Centers might do this differently and keep the bag closer.
Trap Individual Block
I haven’t typically run this as an individual drill, but I think it makes sense now. Lay a dummy down to simulate the the trap angle. For example, if trapping right the bag would be down at about the lineman’s right foot and 45 degrees away. The defender with bag or shield is at the end of the dummy. Teach the player to stay tight to the dummy to prevent inside spill, using same-shoulder technique. Start with a slight drop step, pointing toe right at defender. Don’t get too deep and teach a “banana course” into defender to drive back and away.
Run two of these stations concurrently: trap right and trap left. After you block, you take the bag from the defender. Defender goes to the end of the line of the other side.
Release Block
I usually run this and just call it backer block, but Paul teaches this a bit differently. He puts a stand-up dummy right in front of the player and looks for a flat step out then to the backer (holding shield) about 3 yards back from the dummy. Run concurrently with release right and release left stations.
Reach Block
Same as I teach it in my book, but I like this talking point: if the defender won’t let you reach, try to keep running him off the field to the bench. Likewise, run this concurrently with reach right and reach left stations.
Kickout Block
Run kickout block right indy by placing a cone just to the right and slightly behind the blocker. Have him throw elbow violently when he opens and gains depth. Teaching point (for down, buck sweep) is to aim for the rear end of the WB. This is also a same shoulder kickout technique.
Log Block
He teaches a “bad trap” technique when a defensive end is closing hard to make the log look like a cross-block or kickout, but then wrong arm the trap. Otherwise this drill looks just like the kickout drill but with a log technique.
Combination Blocks
Crossblock
He runs this drill exactly like I do, concurrently with crossblock left and right.
Fold Block
This is when a lineman is going to fold to backer over the next lineman. They stagger two defenders, stacked, over the folding lineman. For a fold right combo, another lineman will be to the right of the folder and will execute a gap or down block left. The folding lineman does a drop step, crossover, tightly seals with the other lineman, then gets over to backer keeping his shoulders square to the LOS.